diy

21870 readers
8 users here now

Finally, a comm for that one user who hand-makes longbows. This ones for you, comrade.

founded 4 years ago
MODERATORS
1


Hi! Did you bump into this post from the pin on !diy@hexbear.net? Check on my current progress on my user posts! This account is a dedicated alt for this project alone, sorting by my new posts will show the latest on this project.

Hey ๐Ÿฅฐ I'm a transfem who's been working on something that I think might be of interest here and I'd love to share, because I believe that we can share a very mutually beneficial relationship. This post is about permanent hair removal.

I am going to use the term "transfeminine" in the following as an abridged version of "transfeminine, non-binary, and any other individual, queer or not, who would feel more confident and affirmed with less facial or body hair". This is a project for everyone.

A little bit of background on permanent hair removal:

Really, the only two options on the table are laser/IPL and electrolysis. Speaking to the former first, laser/IPL is without a doubt the most accessible of the two options, but it comes with a lot of drawbacks. For one, laser/IPL is neither permanent nor complete. This may sound like an immediate dealbreaker, but the ability to delay and diminish hair growth down to light wisps for months to years at the cost of only a handful of sessions makes it a valuable instrument in transfeminine gender affirming hair removal. The drawbacks don't end there though; another serious and deeply unfortunate drawback of laser and IPL hair removal is that they don't work on all skin tones and hair colors. The mechanism of action depends on light passing through the skin and being absorbed by hair roots (which then heats up the follicle, damaging it, hopefully, to the point that it is unable to continue growing), meaning both light skin and dark hair are requirements for eligibility. This is deeply unfortunate for all but People of Pasta. AyyyyyOC There are other drawbacks, like an increased incidence of adverse skin reactions relative to electrolysis, but the two issues noted above make it a non-starter for black and brown folks and extra-bleached-flour crackers. These issues in mind, laser/IPL is a tool that can be relied on at times, but for trans folks, laser/IPL is a non-starter for bottom surgery preparation due to the incompleteness and temporary nature of the procedure.

Electrolysis is permanent, 100% complete, works on all skin tones and hair colors, and has a lower incidence of skin-related side effects. Perfect! What's the catch? Electrolysis is expensive as fuck. Where a complete course of bikini area laser or IPL may cost hundreds of dollars, the same area with electrolysis will cost thousands, sometimes as high as tens of thousands of dollars, due to the fact that unlike laser/IPL, which takes a second per exposure and can be done in areas of hundreds of hairs at a time, electrolysis must be done hair by hair, which is a lot of time to spend with a licensed cosmetologist/electrologist. Costs are similarly prohibitive for facial electrolysis, and even more wildly exorbitant for body hair removal due to the large surface area, so much that it is virtually never even discussed as an option for this. This won't do either. What is to be done? back-to-me-shining

The mechanism of action of electrolysis hair removal is to insert an electrode in the form of a fine needle down the hair shaft and pass a current through the electrode, into the hair root, and out through a return electrode elsewhere in the body. This causes an electrochemical reaction in the hair root that produces a few nano/microliters of lye, which super, definitely, for sure kills the hair. (if you know the difference between galvanic, blend, and thermolysis, you're way ahead of the class, good eye but I'll bring it up again later.)

At home electrolysis exists, but it is not easy or cheap as it currently stands. Issues with machine quality, battery consumption, and power make this an option, but an undesirable one. My hope is that we can make it easier, cheaper, and safer, by designing an option that is more robust, more available, eats through fewer batteries, operates with greater power, and is designed with constant dynamic community dialog.

One thing I didn't lose in my transition is my audacity: surely I can make a device that applies a small current through a fine needle-like electrode in a short burst, right? So I got to researching. Can I buy professional-quality electrolysis needles without a cosmetology license? (yes, I can!) Are there readily accessible schematics for precision low-amperage current sources widely available? (yes, there are!) Are there resources available not paywalled behind cosmetology/electrology programs to learn to use this thing once I have a prototype? (yes, there are!) Has anyone tried to do this before? (Yes!!! Twice!!! More than that! Reddit user /u/abbxrdy, Github user ivanbarayev, the folks on the Hairtell forms, and Andrea James at Transgender Map, I have so much love in my heart for you. Here's to hoping that your work forms the foundation to bring accessible hair removal to all.)

My goal is to make a highly buttoned up, safe, accessible, and presentable electrolysis solution for transfeminine people to use on themselves, each other and for others to use on them. I want to cut out the cosmetologists, or specifically those in the electrolysis chain that take the surplus value from transfeminine people, like salon owners and machine manufacturers. I also want to avoid reliance on sparsely available, weak, and poor quality machines, which are the current sole option for at-home electrolysis. Ultimately, the goal is to bring safe, highly effective, and accessible electrolysis hair removal to all. Currently existing solutions generally fail on at least one of these. My objectives are as follows:

  • Develop a circuit that can administer a 0.1 to 10 second pulse of current between 0 and 2 mA at a voltage between 0 and 25 V through an electrode upon each press of a button, foot pedal, or even bite switch, with no wall plug-in for safety reasons - battery power only.
  • Make it into a printed circuit board that can be ordered and built out with no more than a soldering iron and YouTube tutorial level soldering skills.
  • Develop a design for a probe that can hold an electrolysis needle, that can be actualized at home, without any advanced tools.
  • Create a high quality and easy to follow manual for the build and usage of the device. This is missing with all current DIY solutions. This has to be something that is truly accessible to all - no electronics knowledge, wiring, debugging, multimeters, or anything else like that necessary.
  • We're shooting for a budget under $100, but in general, cost is a deciding factor. It's not accessible if it's expensive.
  • For now, my intention is to start with a galvanic only electrolysis machine. Blend and thermolysis produce much faster results, but I don't feel as confident working in high frequency electronics, and with galvanic being the most reliable option, despite being slower, it's the obvious pick for the 1.0 version. If this takes off, the plan is to continue with a blend or a mode-selectable version, which would really democratize electrolysis. If this works, blend electrolysis provides ten times faster hair kill time, and it's next on the menu. ๐Ÿ‘€

Here's what I'm capable of doing by myself:

  • I'm an experienced multidisciplinary engineer. I have the skills to see through a basic version of this project to completion.
  • I can also write a nice assembly and usage guide, I have experience in guide and technical writing for laypeople.
  • I can bankroll all R&D and prototyping.

Here's what I would definitely benefit from community help on:

  • I work terribly alone. I find it hard to get motivated if I don't have a team to share the work with or at least bounce ideas off of. I'm also not deeply experienced in this, and community collaboration will get rid of a lot of stumbling blocks that are probably easy avoidable. If you're experienced in analog electronics, you're the number one type of person I'm looking for, but I'd also love to work with digital/embedded folks when it comes to interface/UX time, or additionally anyone with electromechanical design experience for the probe.
  • Saving the above, I still do much better with folks on the sidelines cheering me on, asking me questions, and keeping me accountable than I do alone, even if I'm working by myself.
  • If you're a professional electrologist, I'd love to know what you like and don't like in a machine, what features are mandatory, what features are nice to have, and what features are pretty useless. If you have any other tips and advice, let me know!
  • If you've tried DIY electrolysis before, please tell me how it went and how I can do better than whatever your most recent attempt was!
  • I need help discussing the licensing. Do I want to go hardline GPL to prevent this from being picked up by manufacturers? Do I make it as open as possible with the hopes that someone can fabricate nice ones? Do I allow for manufacture with the provision that royalties be paid to some entity, which can then be redirected to some mutual aid project/charity/Maoist insurgents? Maybe even use a personal use only clause so I reserve the option to sell units as a worker's cooperative? This is all cart before the horse shit, but it's stuff that needs to get worked out before I make a github.
  • What do I call it???

Going forward, I plan to post regular bi-weekly updates to keep this alive, days of the week pending Maybe Thursday and Sunday?. Look forward to the first journal entry/post tonight where I show off what I have so far! I think /c/diy is the most applicable place to post due to the comm purpose, but this initial post is getting cross-posted to /c/traaaaaaannnnnnnnnns due to the relevance in that community.

Let's stay in touch! This is an alt but I'll be checking it frequently. Thanks for being an awesome online community and I hope this can happen in a way that results in material good for my comrades. meow-hug

2


What did I expect from a $50 chair, but now it works.

3


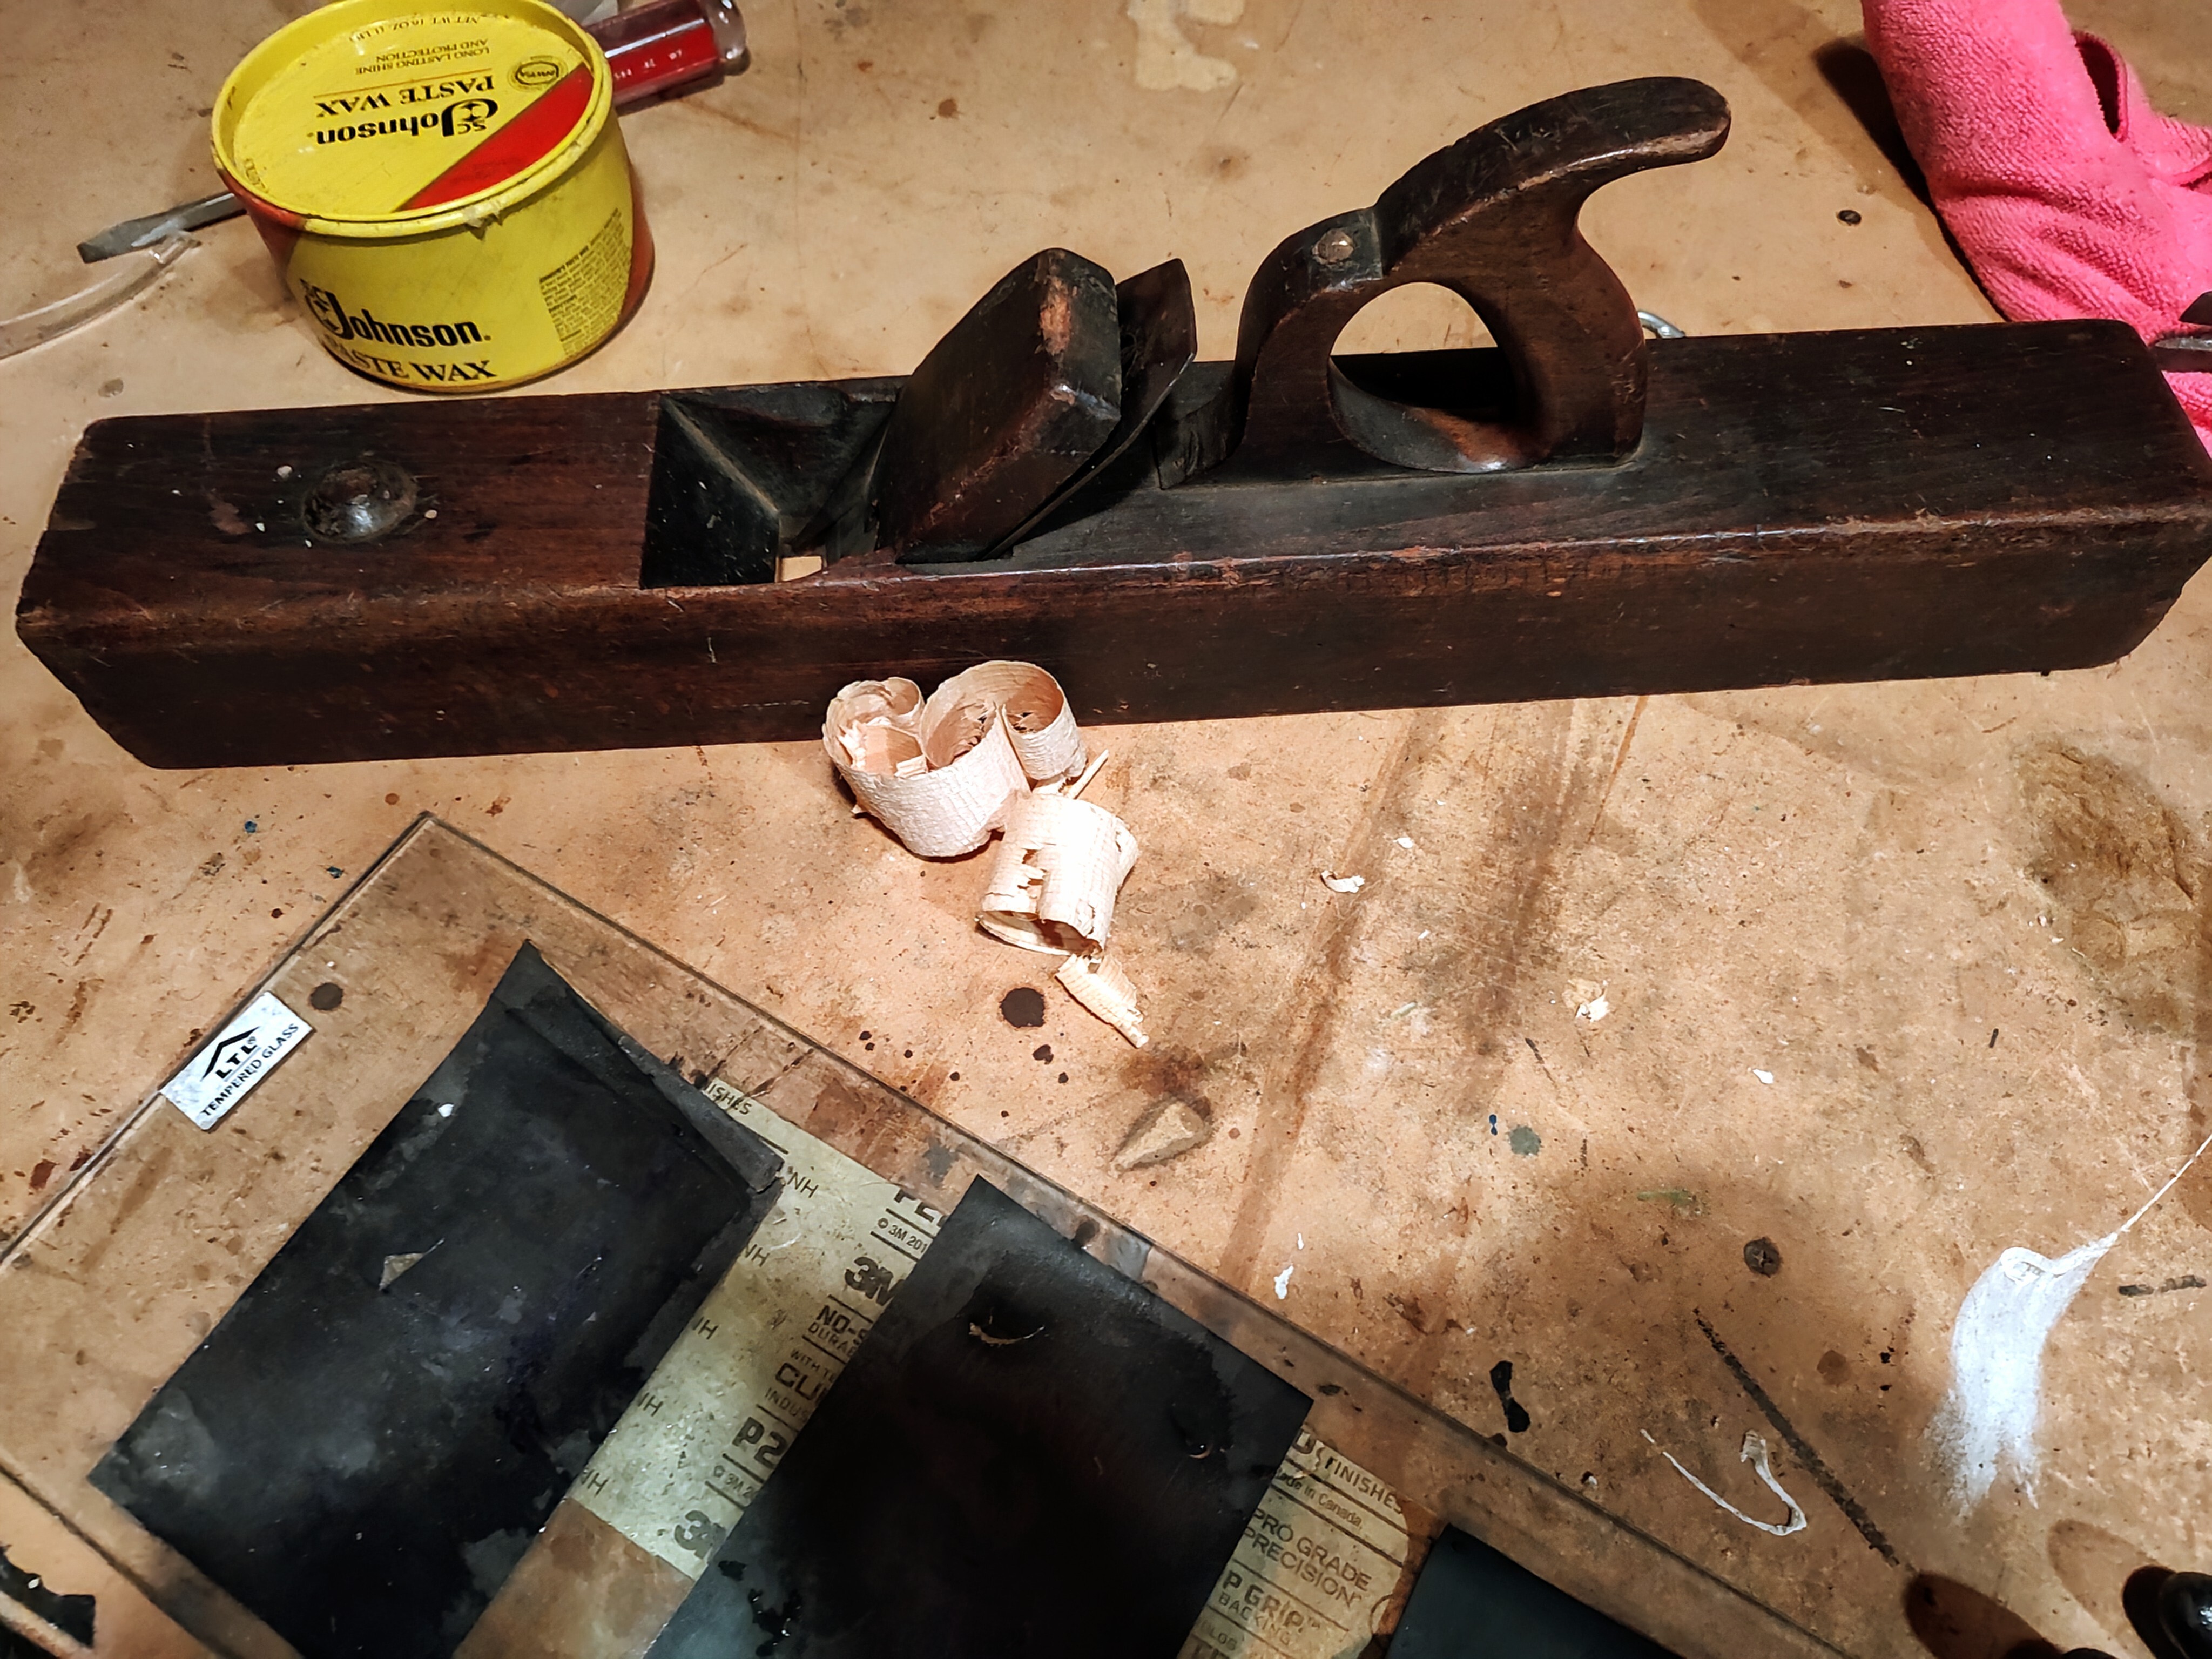
18th century joiner plane. All it needed was a little flattening, and sharpening of the iron and chip breaker. It takes a beautiful shaving now.

I am working towards building my own workbench. When I moved in there was one in the garage already but the top is MDF, and it's way too wide at like 5 feet. I hate that I can't walk around it or reach the other side, it gets mad dirty back there.

I am going to make a fore plane next, but before that I need to make floats. Then I will be all set.

4


We have these 2 paver steps that are awkwardly tall. I'd like to add 2 steps to this by adding another layer of pavers to the lower step here, then adding 2 steps going off of that.

Would it be a bad idea to just lay the new steps directly on the existing ground level patio steps?

I've seen mixed guidance on using construction adhesive vs just polysand. Any thoughts on that?

5


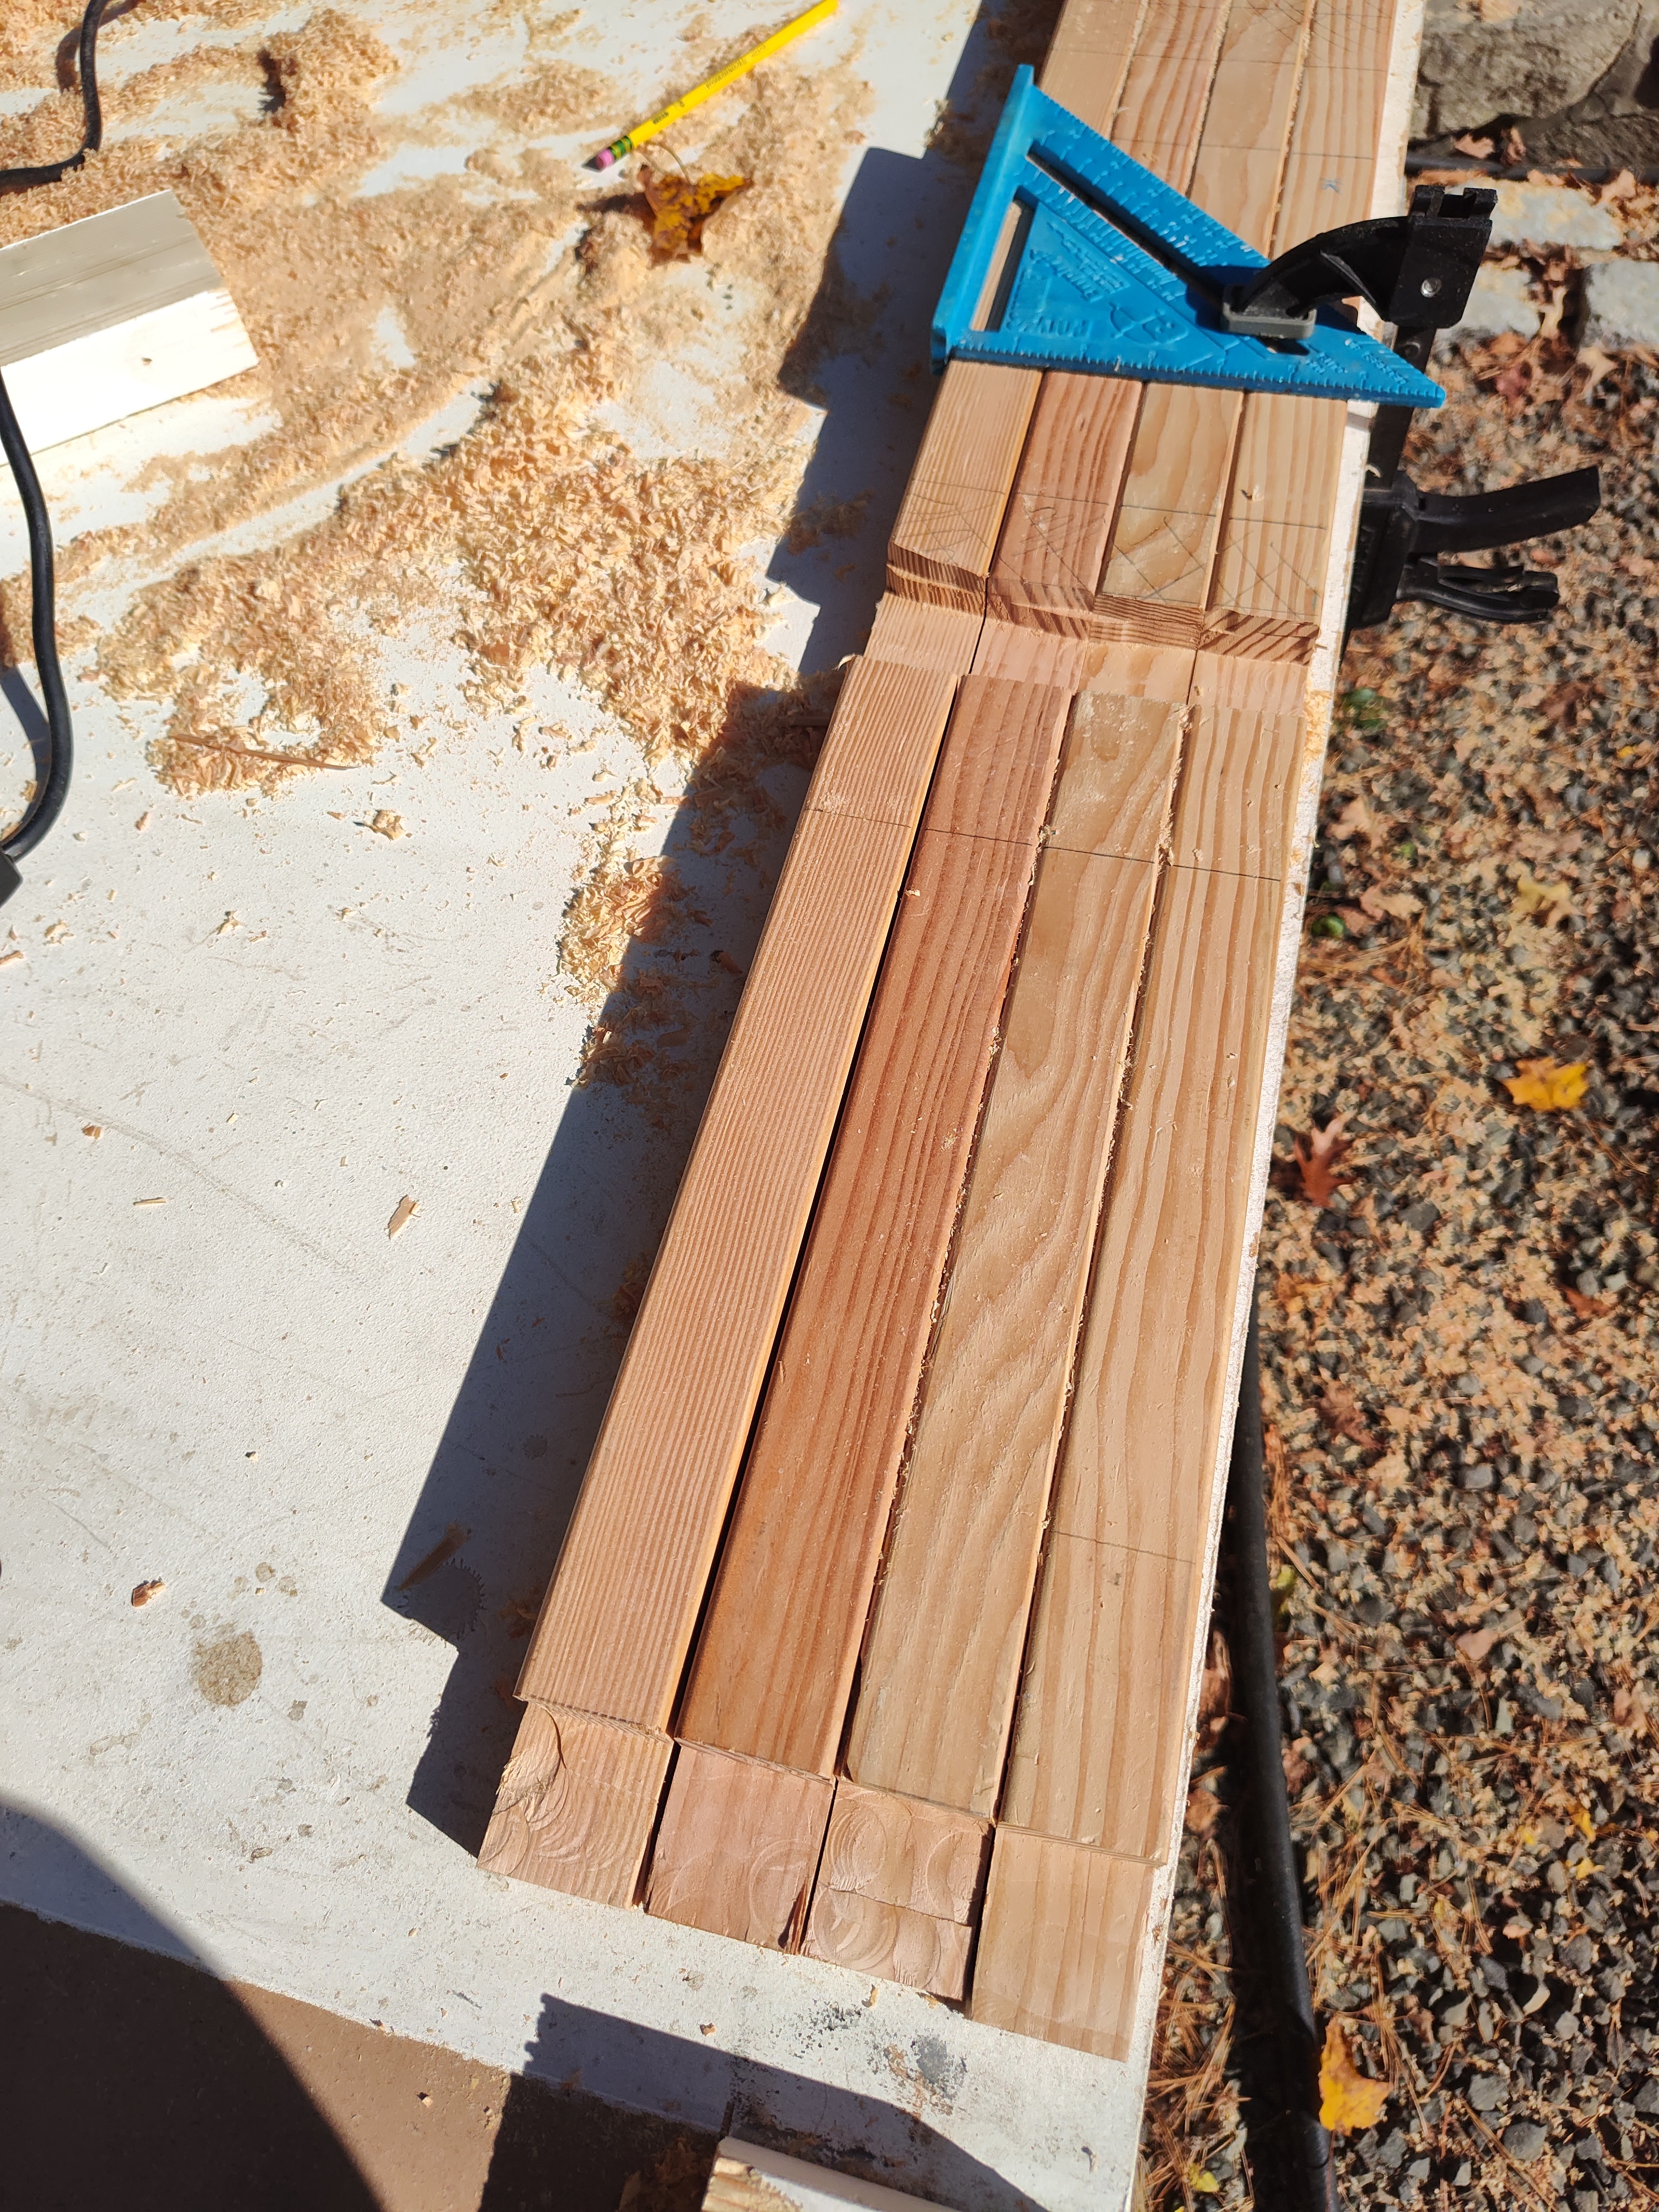
I bought a cheap router at a flea market and thought it would be good to do some shop shelves as a learner project. These are the rails for the shelves that slot into the legs with lap joints. I was going to drop some 2*4 spreaders in to the top and cut the grooves on the wrong goddamn face and now I have to redo them, and of course, don't have the material so I have to go to the fucking hardware store now

Diy rule of thumb, take the time estimate for completing a project and multiply it by 3... Or 12 lol

6


Some people collect stamps, some people collect baseball cards. I have realised that I collect spices. My small spice cupboard is full of jars, bags and bottles of different spices and it is a giant mess. I always have to take ten different things out of the cupboard to get what I want. It is annoying and takes a lot of time.

I would like to have some boxes to put inside the cupboard. Then I could just take the box out, get what I want and put it back.

I could buy some plastic organising boxes and be done with it but there are many spices and the cupboard is small so I can't afford to lose any space. I need something that fits snuggly in the cupboard so I have to make it myself.

I would like some good ideas on how to make the boxes. Ideally they would:

  • Be made of thin material not to take up space
  • Be strong enough to hold a box of salt or a bottle of soy sauce.
  • Be easy to clean, or at least able to withstand being wiped with a damp cloth
  • Be easy to make without access to a proper workshop
  • Be cheap

I don't know if any of this is possible. Thin wood would be nice but it can get quite expensive and would need more time and tools than is feasible for my situation. Cardboard covered with something moisture resistant would be easy and manageable to make but I'm not convinced about it being strong enough or about if it is able to withstand cleaning. It would be cool if you could make custom-sized plastic boxes but you can't do that, right?

7


This is a really cool project he's been working on for a while. I love how he's keeping it extremely low tech too.

8
1
YES (hexbear.net)
submitted 2 months ago by RNAi@hexbear.net to c/diy@hexbear.net
 
 
9
10


This dude is experimenting with some neat stuff here. He created a stable, non-toxic PCM that can be recharged with the cold of a basement (or a hole in the ground!) using inexpensive ingredients (food-grade sodium sulfate, table salt, water, and xanthan gum) that reheats more slowly than ice.

He shows how to make little packs you can use in a cold vest and larger, torso-sized packs that could help a person with heatstroke using a towel soaked in the PCM and contained in a trash bag.

I think this is pretty exciting and could be a great project for mutual aid groups - would be awesome to have some of these cold packs to give out with a FNB meal.

11


hello comrades! It's been a minute! I'm back with my first tech update since upending my entire life and getting re-settled! Let's talk meow-coffee

What I've been up to

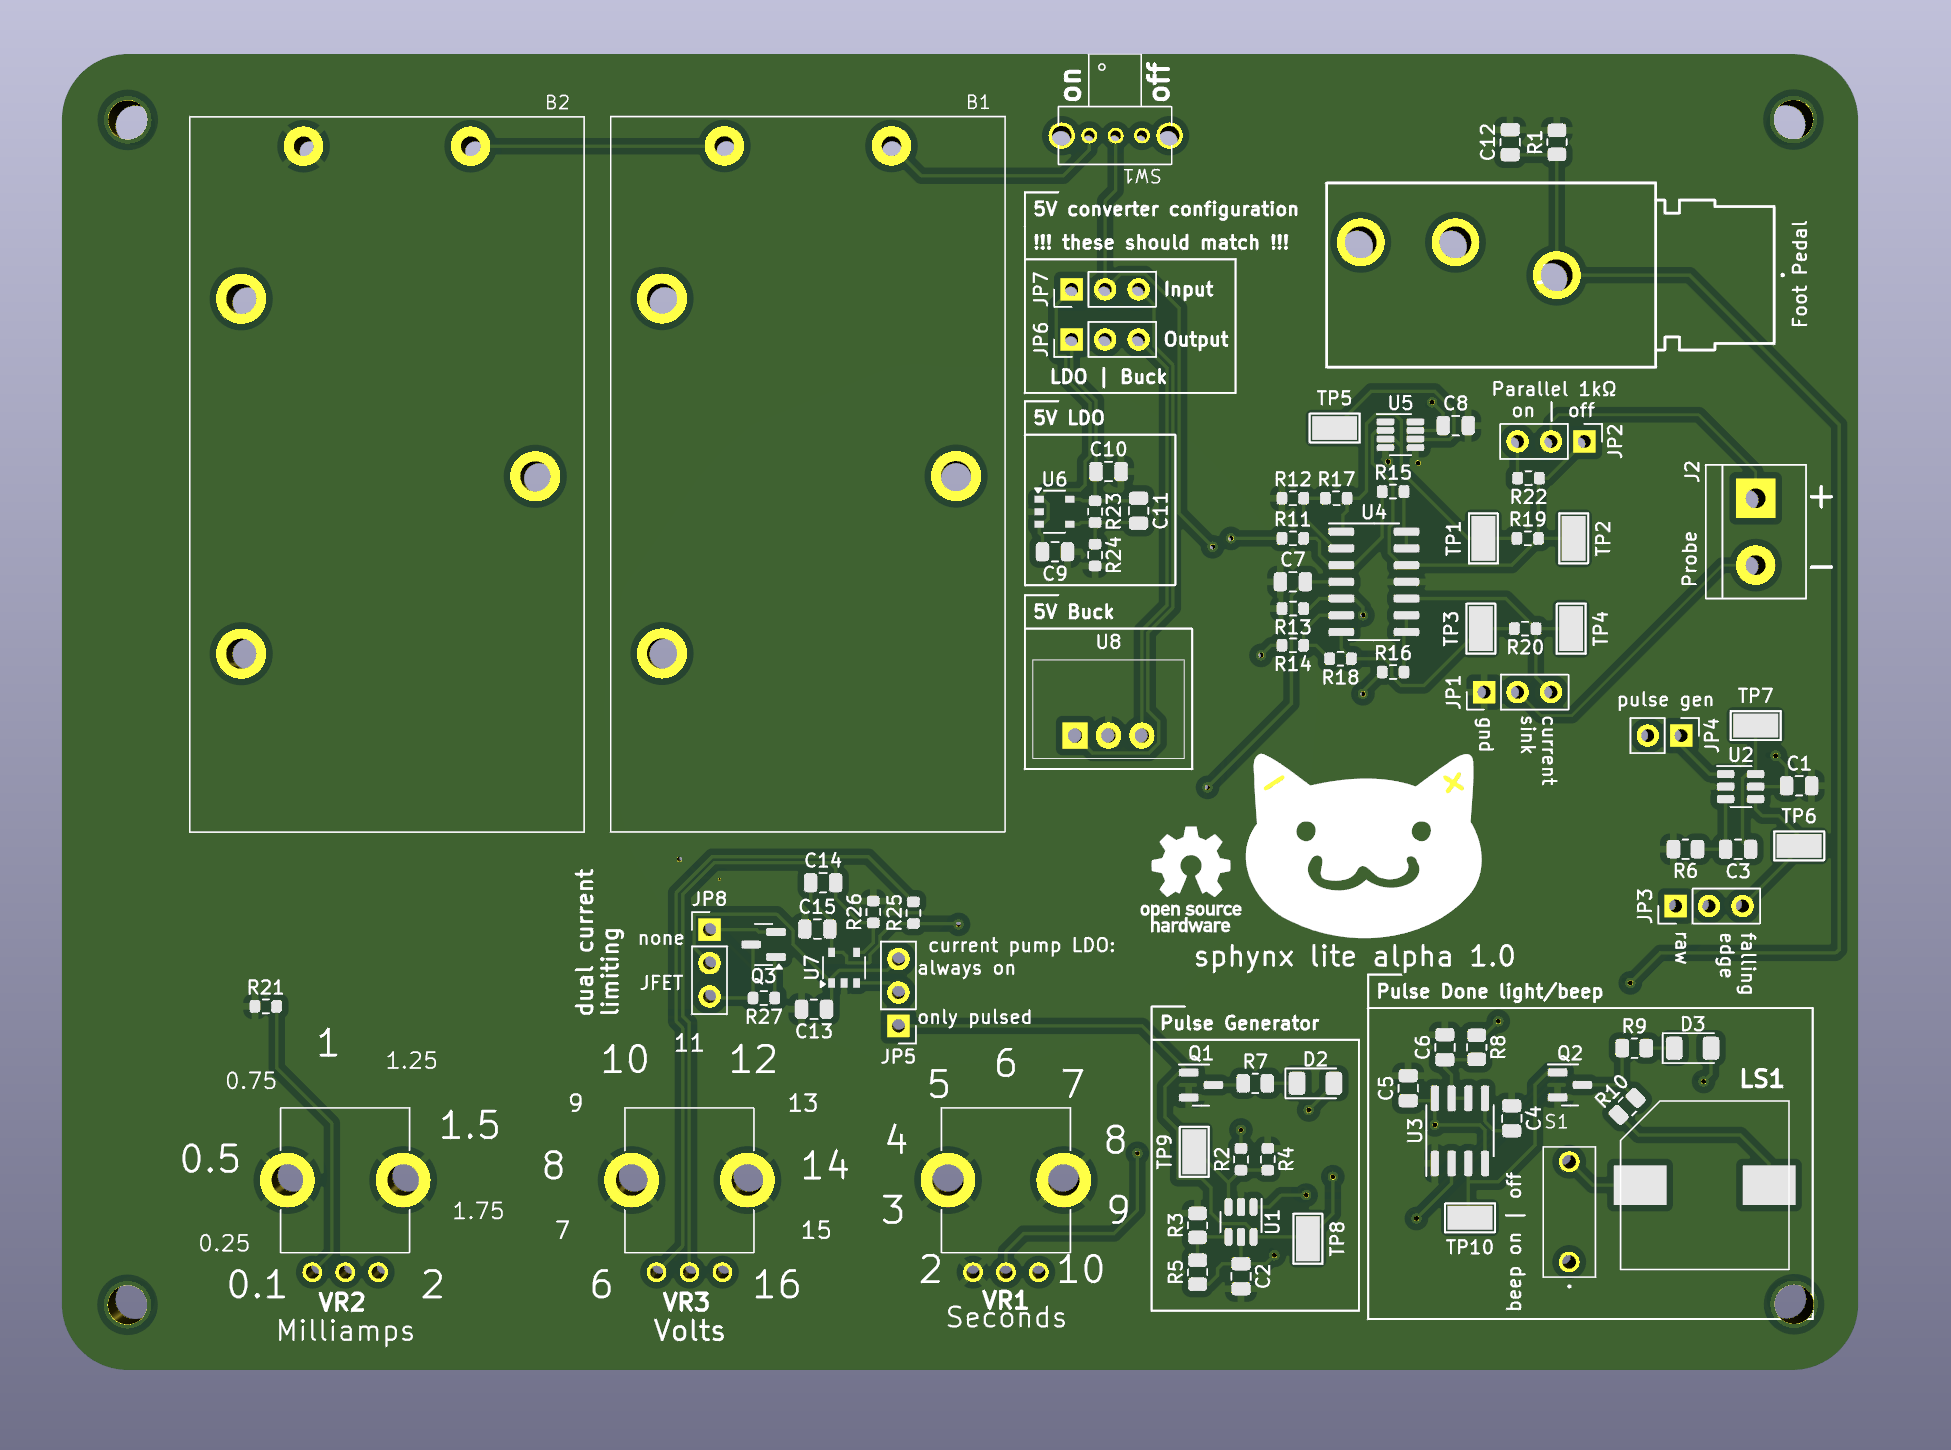
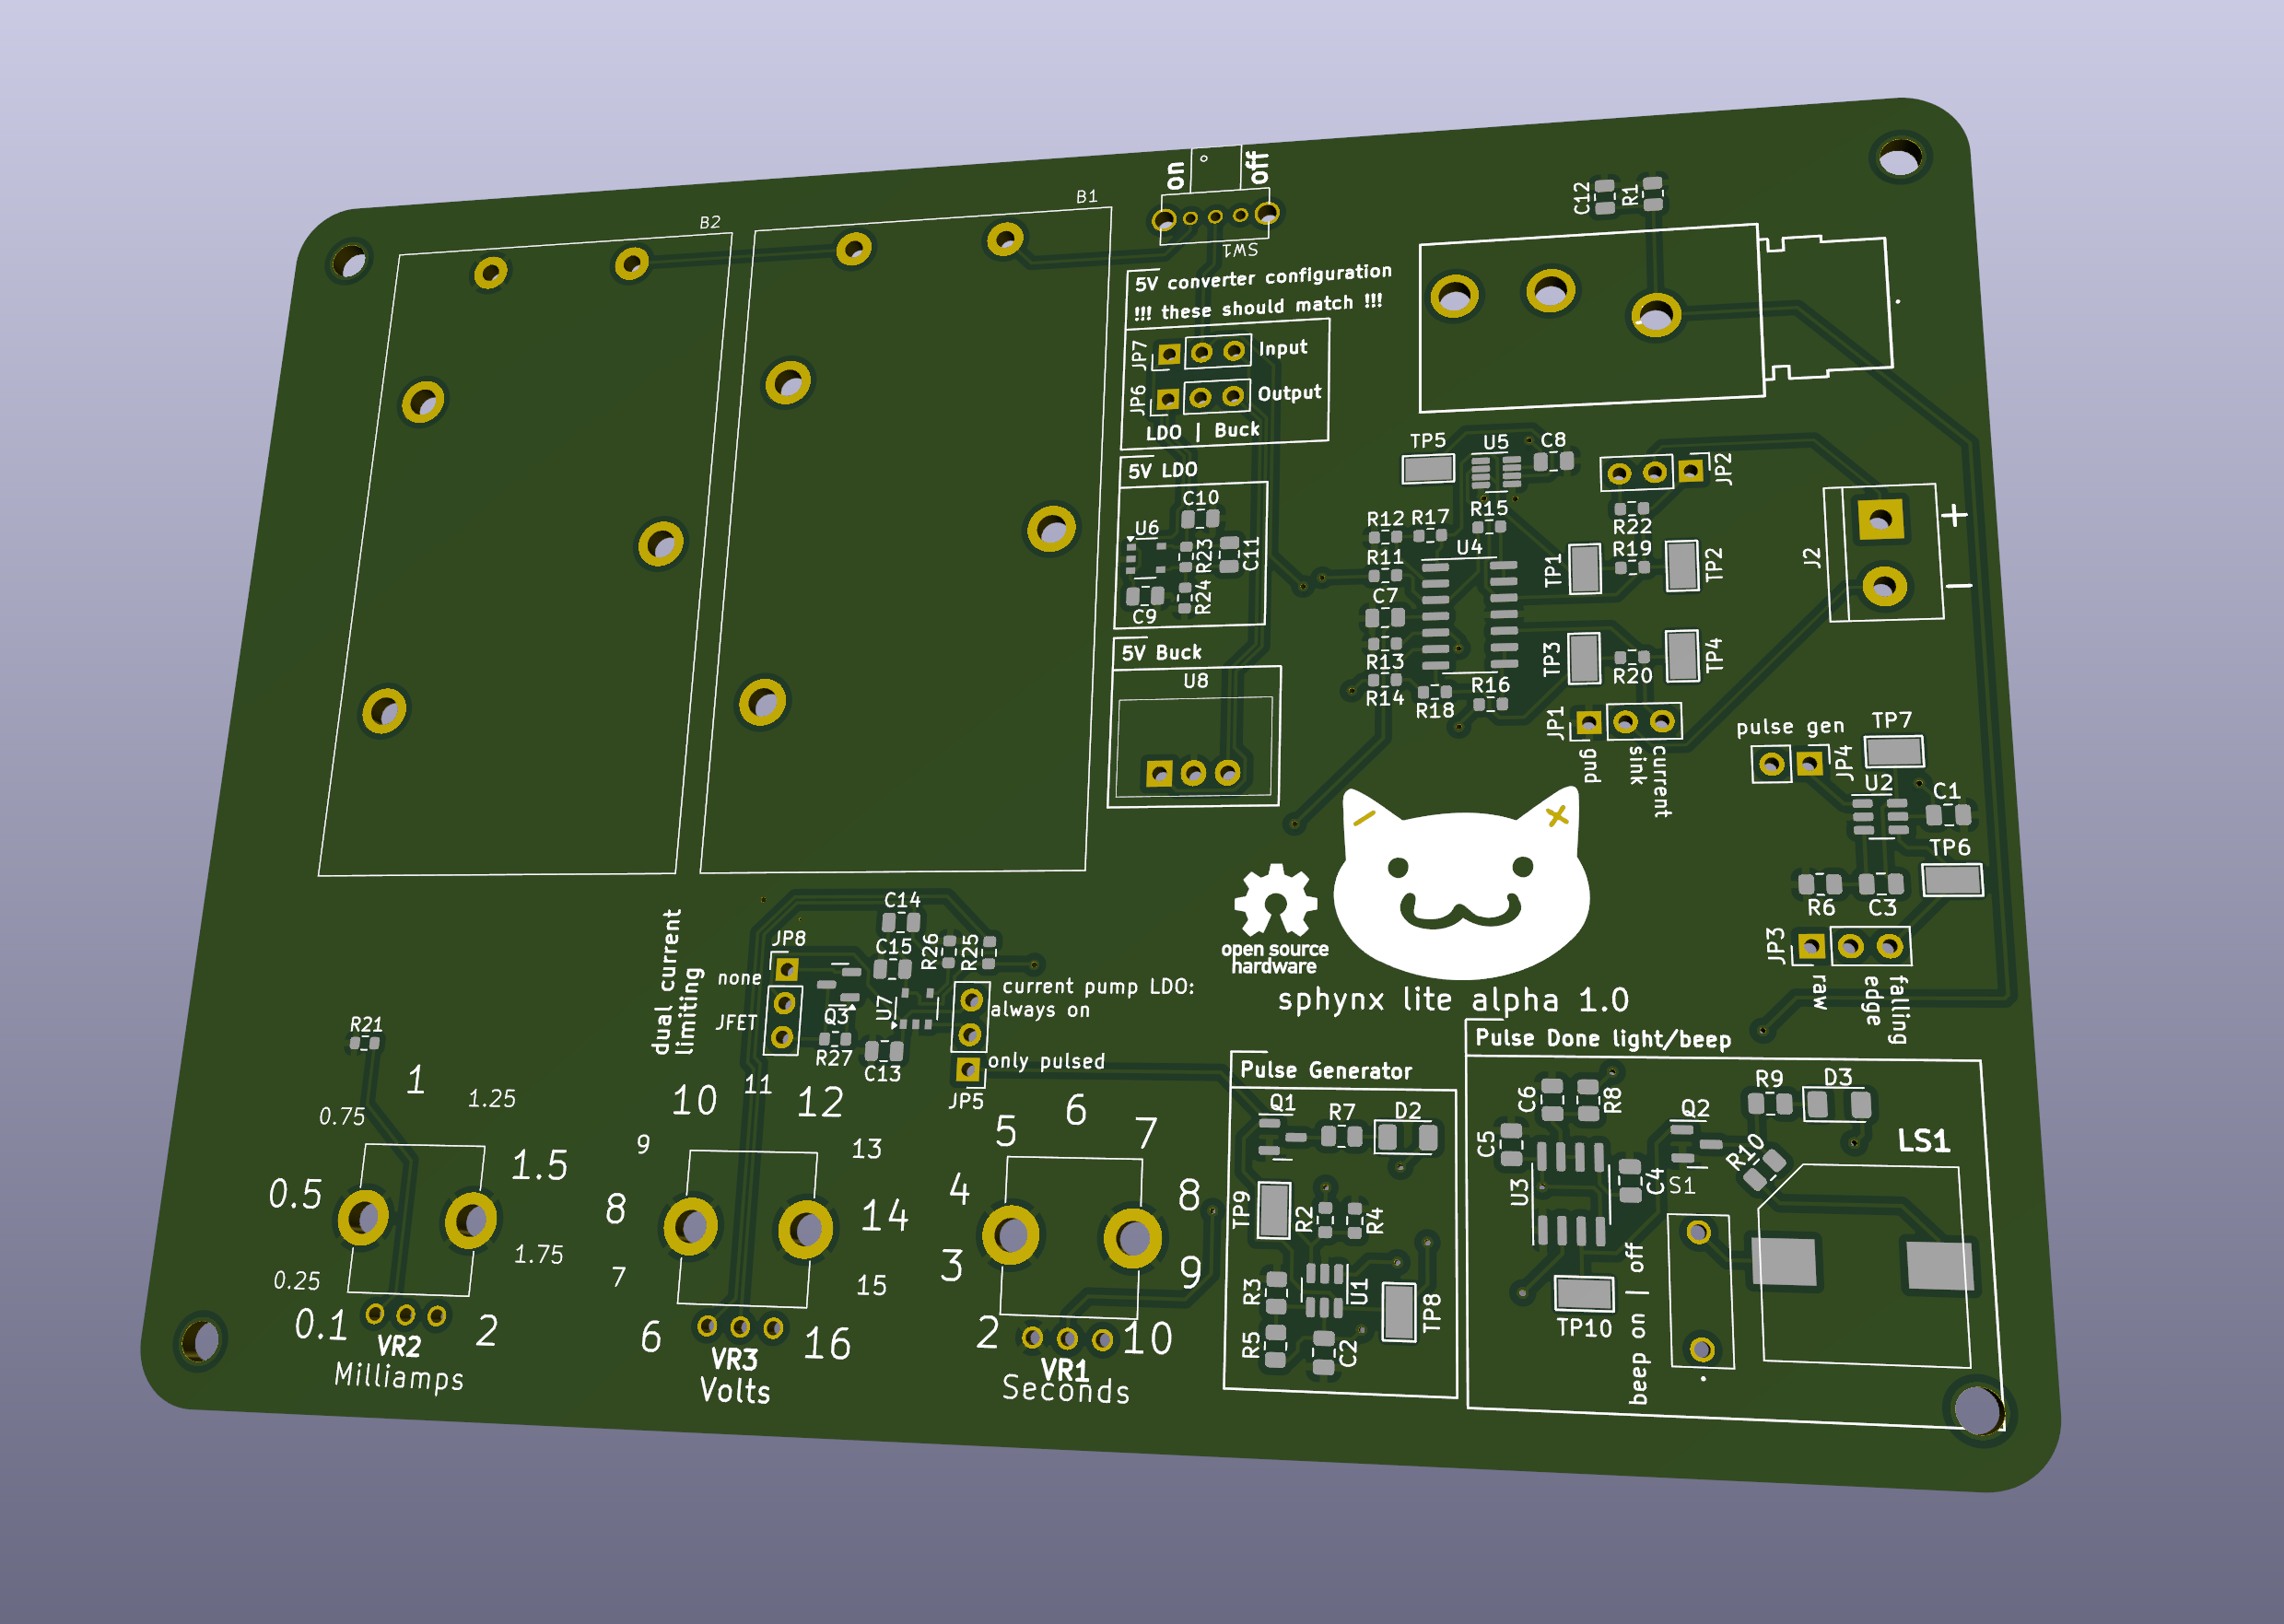
See for yourself, pictured is the first alpha of the Sphynx Lite. Schematics are on git, go check it out (and if you want to set up KiCAD to view or edit but aren't quite sure how, say so in the comments and me or someone else will help you out!)

Issuing guidance on the usage of these things is complicated. I'm always going to be a little apprehensive recommending that people use this, because I'm a very cautious person. For now, I think my official guidance is:

  • you should understand the circuit
  • you should have basic debugging equipment
  • you should have the time to work with it extensively
  • if you meet all of the above, I provide this with no warranty and no guarantee, knowing you full well have ideas as to what you might want to use it for
  • If you have a decent working knowledge of electrical engineering and want a walkthrough, I might make a Matrix so I can actually communicate with people looking to get it going??

As it gets more mature and I revise and revise until I drop the alpha, I'll trust it more.

This was a push across the finish line. I optimized for getting something testable done with the correct topology, layout is a little dicey (cut off silk screen in the bottom right kitty-cri) and subject to change, I just needed something to test on. I was gone for over two weeks from my last post here, mainly because it was just a lot of work with nothing intermediate to report. But now it's here! This has all the working parts of the last boards merged into one, with the new additions of:

  • power conditioning
  • 9V battery holders
  • additional safety measures, like the redundant current limiting JFET
  • configuration jumpers! and test points!! !!!

Oh, and I whipped up a cute lil logo. :3

Schematics

schematics in here

Board Layout

board layout in here

Board Renders

board renders in here

Next up

I have a lot of really good work from y'all that I need to capture and incorporate. Particularly, my immediate plans while this board is fabricated and shipped are to:

  • Incorporate @ComradeEd@lemmygrad.ml's patchset porting the site to Jekyll - really thank you so much for this, I've been extremely focused on the board, and now that I have a minute, I can get the site going so I can use it to show off, post guide, aggregate educational resources, etc. This is going to be absolutely necessary for the project to have the reach and accessiblilty I'm hoping it gets. Thank you. meow-hug
  • Build a probe per @YearOfTheCommieDesktop@hexbear.net's work into coming up with a probe holder. I have a handful of the Yasutomo's to experiment with. This is going to be a game changer, currently I'm doing self-work with an alligator clip and it's extremely irritating. An ergonomic and reproducible probe with an extremely cheap parts list is critical for the project to function. Thank you. meow-hug
  • More of you provided meaningful help than just these two, these are the two who's work I'm directly interacting with this minute. Thank you to everyone who has stopped by and made suggestions, I've read them all. meow-hug

The next post will be me building this out and reporting on how well (or whether) it works, and documenting changes for the Lite Alpha 2.

I also badly need to make a BOM. With some effort, anyone who's built a board together can buy all the parts for this and make one, but it'd be a thousand times easier if I just made a single cart that you can buy that includes every single component. If you want to make an alpha board for fun or debugging, maybe hold off until I have that out.

Any ways to help?

Honestly, those of you who are following this pretty closely have a good read on what's going on, what's needed, and what's upcoming - keep being interested! If anyone wants to make one, I do recommend waiting until I release a BOM, but very soon we miiight be at the point where other people besides me get one of these in their hands.

I could also use some polish on the logo. It's fine, but it could be cuter, and the lines are a bit funky. I'm going to put SVGs on git soon and if anyone feels like cleaning them up, rearrange the kitty cat face so it's cuter, fixing my wonky paths, let me know!

Also, and I simply cannot stress this enough - when I've been exhausted, when I've been deep in executive dysfunction, when I've been not feeling up for it, I've read through all your encouragement and support throughout the duration of this project and it's helped me to keep pushing. I would unquestionably not be this far without y'all. Thank you all so much. trans-heart


As always, stop by, hang out, say hi, ask questions, tell me what you've been up to, design review me, however you'd like to be involved is good by me! I'm thinking I want to make the expected cadence of posts once every two weeks, just because I'm busy and I don't want to cause alarm when I miss a week. I can always surprise y'all with more frequent posts too.


P.S. - I have no hair regrowth in test areas. meow-melt

12


These parts are not compatible my ass. I'm riding a regular sized V-Brake with Short-Pull STIs on the front, it works, it's a cable that pulls things, you just have to fine tune it more. Oh the rear dropout on this steel frame is 130mm and my wheel is 135mm? Guess what, steel bends, this fits now. The screw from my front side pull caliper brake is too short? Guess what, I put a new one in there and it took me like 15 minutes at most. My axle is too short to affix a front rack? It's a threaded metal rod, fuck you, I purchased a threaded metal rod and now I could affix 8 of the fuckers stacked if I wanted to.

I piss on your compatibility lists, it's a system of screws, pulleys and parallelograms, I can get this shit to work

13


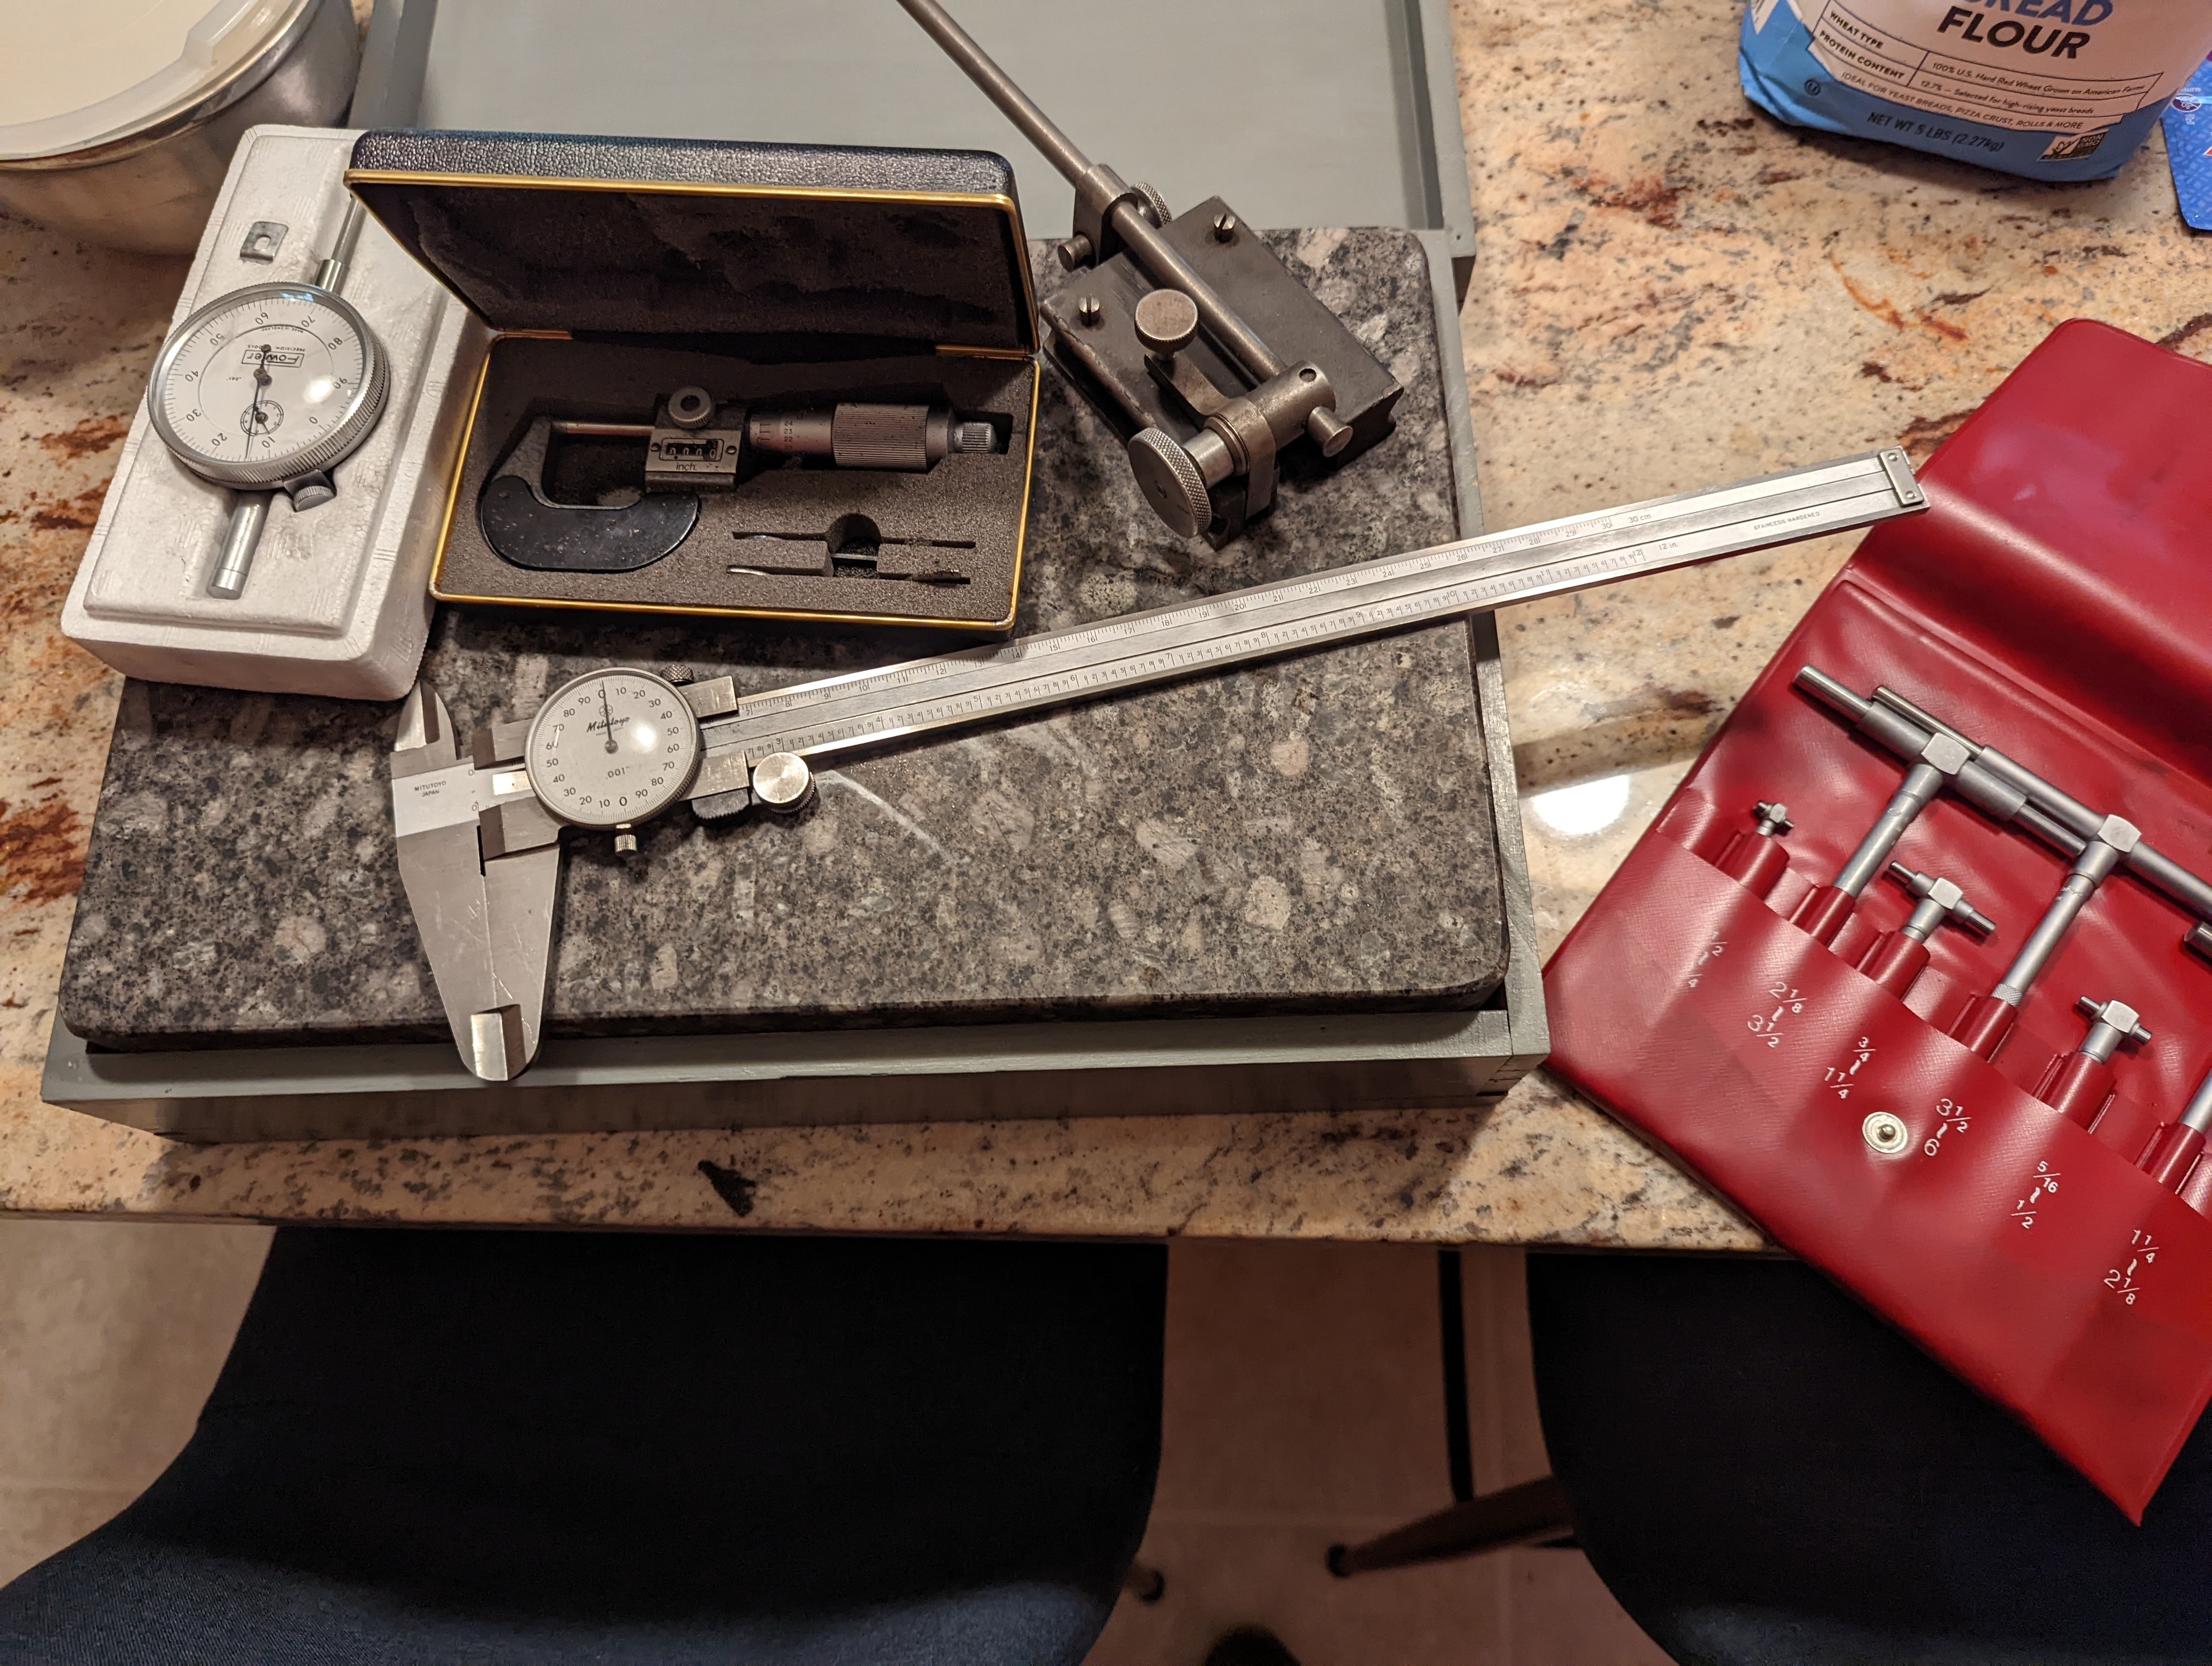
I scored a mitutoyo dual caliper, micrometer, and bore gauges. I also got a fowler indicator, stand, and surface plate. Managed to get everything for $50. bunny-vibe

Also pictured is the poolish I have fermenting for bread I'm going to make tomorrow.

14
15


Like the title says I fixed my remington shaver/clippers today. It started behaving especially badly a couple weeks ago after sitting unused for a bit.

It didn't seem to hold a charge and would fade until the motor stopped dead within 5 or 10 seconds, and seemed to be getting worse. I'm a pretty repair-minded person so I took it apart and took a look around at how it was put together, and grabbed the battery size while I was in there. 1 or two plastic clips broke but ultimately it came apart okay.

So, not seeing anything else obvious I ordered a pre-tabbed replacement battery online and set it aside.

Yesterday I received the battery and tried to install it (a whole other issue, the tabs from the factory were offset on one end so it was tricky to snake the new straight tabs through the pcb). I finally got it in, and voila.... oh wait, it still doesn't work. same issue.

That is why you should always troubleshoot before you buy parts! A quick voltage check on the old battery would have revealed that the battery was full, and not sagging too much under load.

I got back to it today, and after poking around for a few mins with a multimeter, I found that the battery voltage was great, and that the issue seemed to be with the surface mount PTC thermistor that was in series right before the wires that went off to the motor. I removed that thermistor and temporarily bridged the contacts (should be relatively safe in the short term, there is other protection circuitry in there incl a thermal fuse on the battery), and the shaver works great again (I also took the opportunity to remove the insane amount of hair built up in the head of the shaver, which is far too open on this model, allowing things to get inside)

I highly recommend people who are interested get into repair! with a little know-how, plus soldering and desoldering equipment (nothing fancy), you can do quite a bit of little repairs of devices that would otherwise be disposable for no reason

16
17


Bought a house at a discount from a lady that 8 dogs that seemingly predominantly used the bathroom inside. The piss was enough to sting your eyes when you walked in. Pretty nasty stuff.

I really wanted to do a move-in ready home, seems like I always have to do a bunch of work to a place, but it's saved me some money.

Subfloor repairs were pretty significant, but it had to happen anyhow. 70's house with mdf under it that was piss logged, and I laid tongue and groove bamboo anyhow.

I got pretty nervous after demo because I was still getting a urine smell, but it's out now. Got most of the new floor in, but still gotta finish a closet and a bedroom.

Not a terrible project, ended up looking really nice. The bamboo is hard as a brick. Took some trial and error to get the stapler right to not split tongues but to also get the staple all the way through.

18


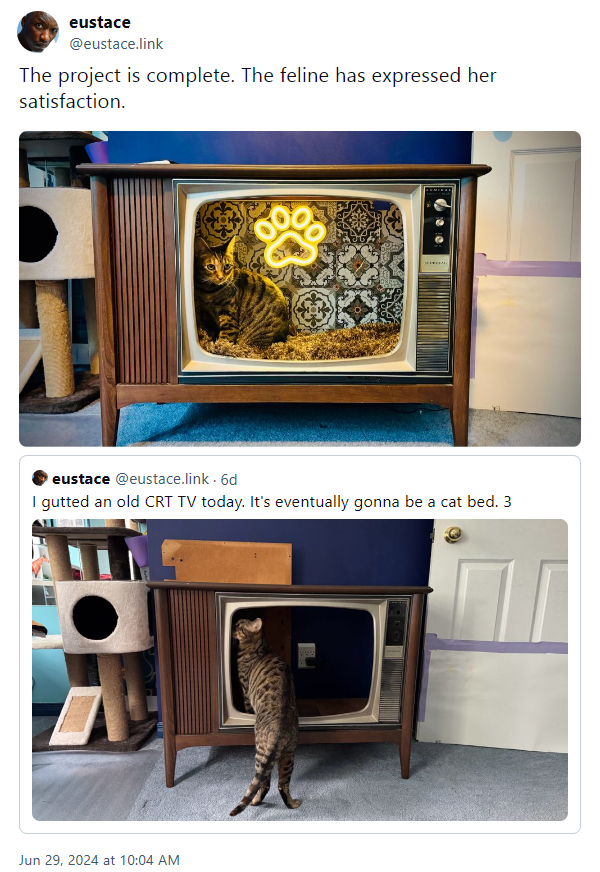
It also functions as a portable Gameboy cartridge player. kelly

19


This thing's 20 years old and has plenty of tears on it. I've used duct tape on it but rain and butt sweat keeps peeling it off.

It's really comfy though so I don't want to get rid of it.

20


Pretty slick little repackage of a UV-5R

cyber-lenin

21


Made of 10 awg copper wire and 18 awg silver plated wire. Copper work hardened more than I thought, wish I went with 12g instead, but it does make the final result sturdier.

22


This article is oldish, it was written all the way back in 2004. I just wanted to share this because it shows another facet of the submersibles world, where every day people build their own submersibles from kit plans. I remember kit plans from back in the day before the internet, when passionate people would subscribe to magazines like Popular Mechanics and (usually) use tons of fiberglass and other materials to build whatever functioning contraption their hearts desired. This is on other end of the spectrum to billionaires descending thousands of meters below the ocean surface, but as of the date this article was written (2004), there were no fatality accidents involving certified submersibles. (I don't know if that safety statistic has changed since 2004, but I was quite impressed with that record either way.)

Here also is a link to one of the main personal submersibles communities, called http://psubs.org/ Personal Subs dot Org.

There are many other resources out there. I've been spending a little time celebrating them and learning something about this fascinating hobby and community.

Cheers.

edit: Here is a list of known incidents involving submersibles since 2000. With the exception of Titan and Nautilus (The Danish submersible intentionally sunk as part of a murder plot, in 2017) , all have involved 1 or more submersible (most often appear to be submarines) involving naval vessels.
https://en.wikipedia.org/wiki/List_of_submarine_and_submersible_incidents_since_2000

23


Cool and useful video for electronics stuff

24


Not as polished as the other video I posted, but still a neat project and it's always cool to see open source and printable board games and toys.

25


Very cool free and open source board game that you 3D print.

view more: next โ€บ