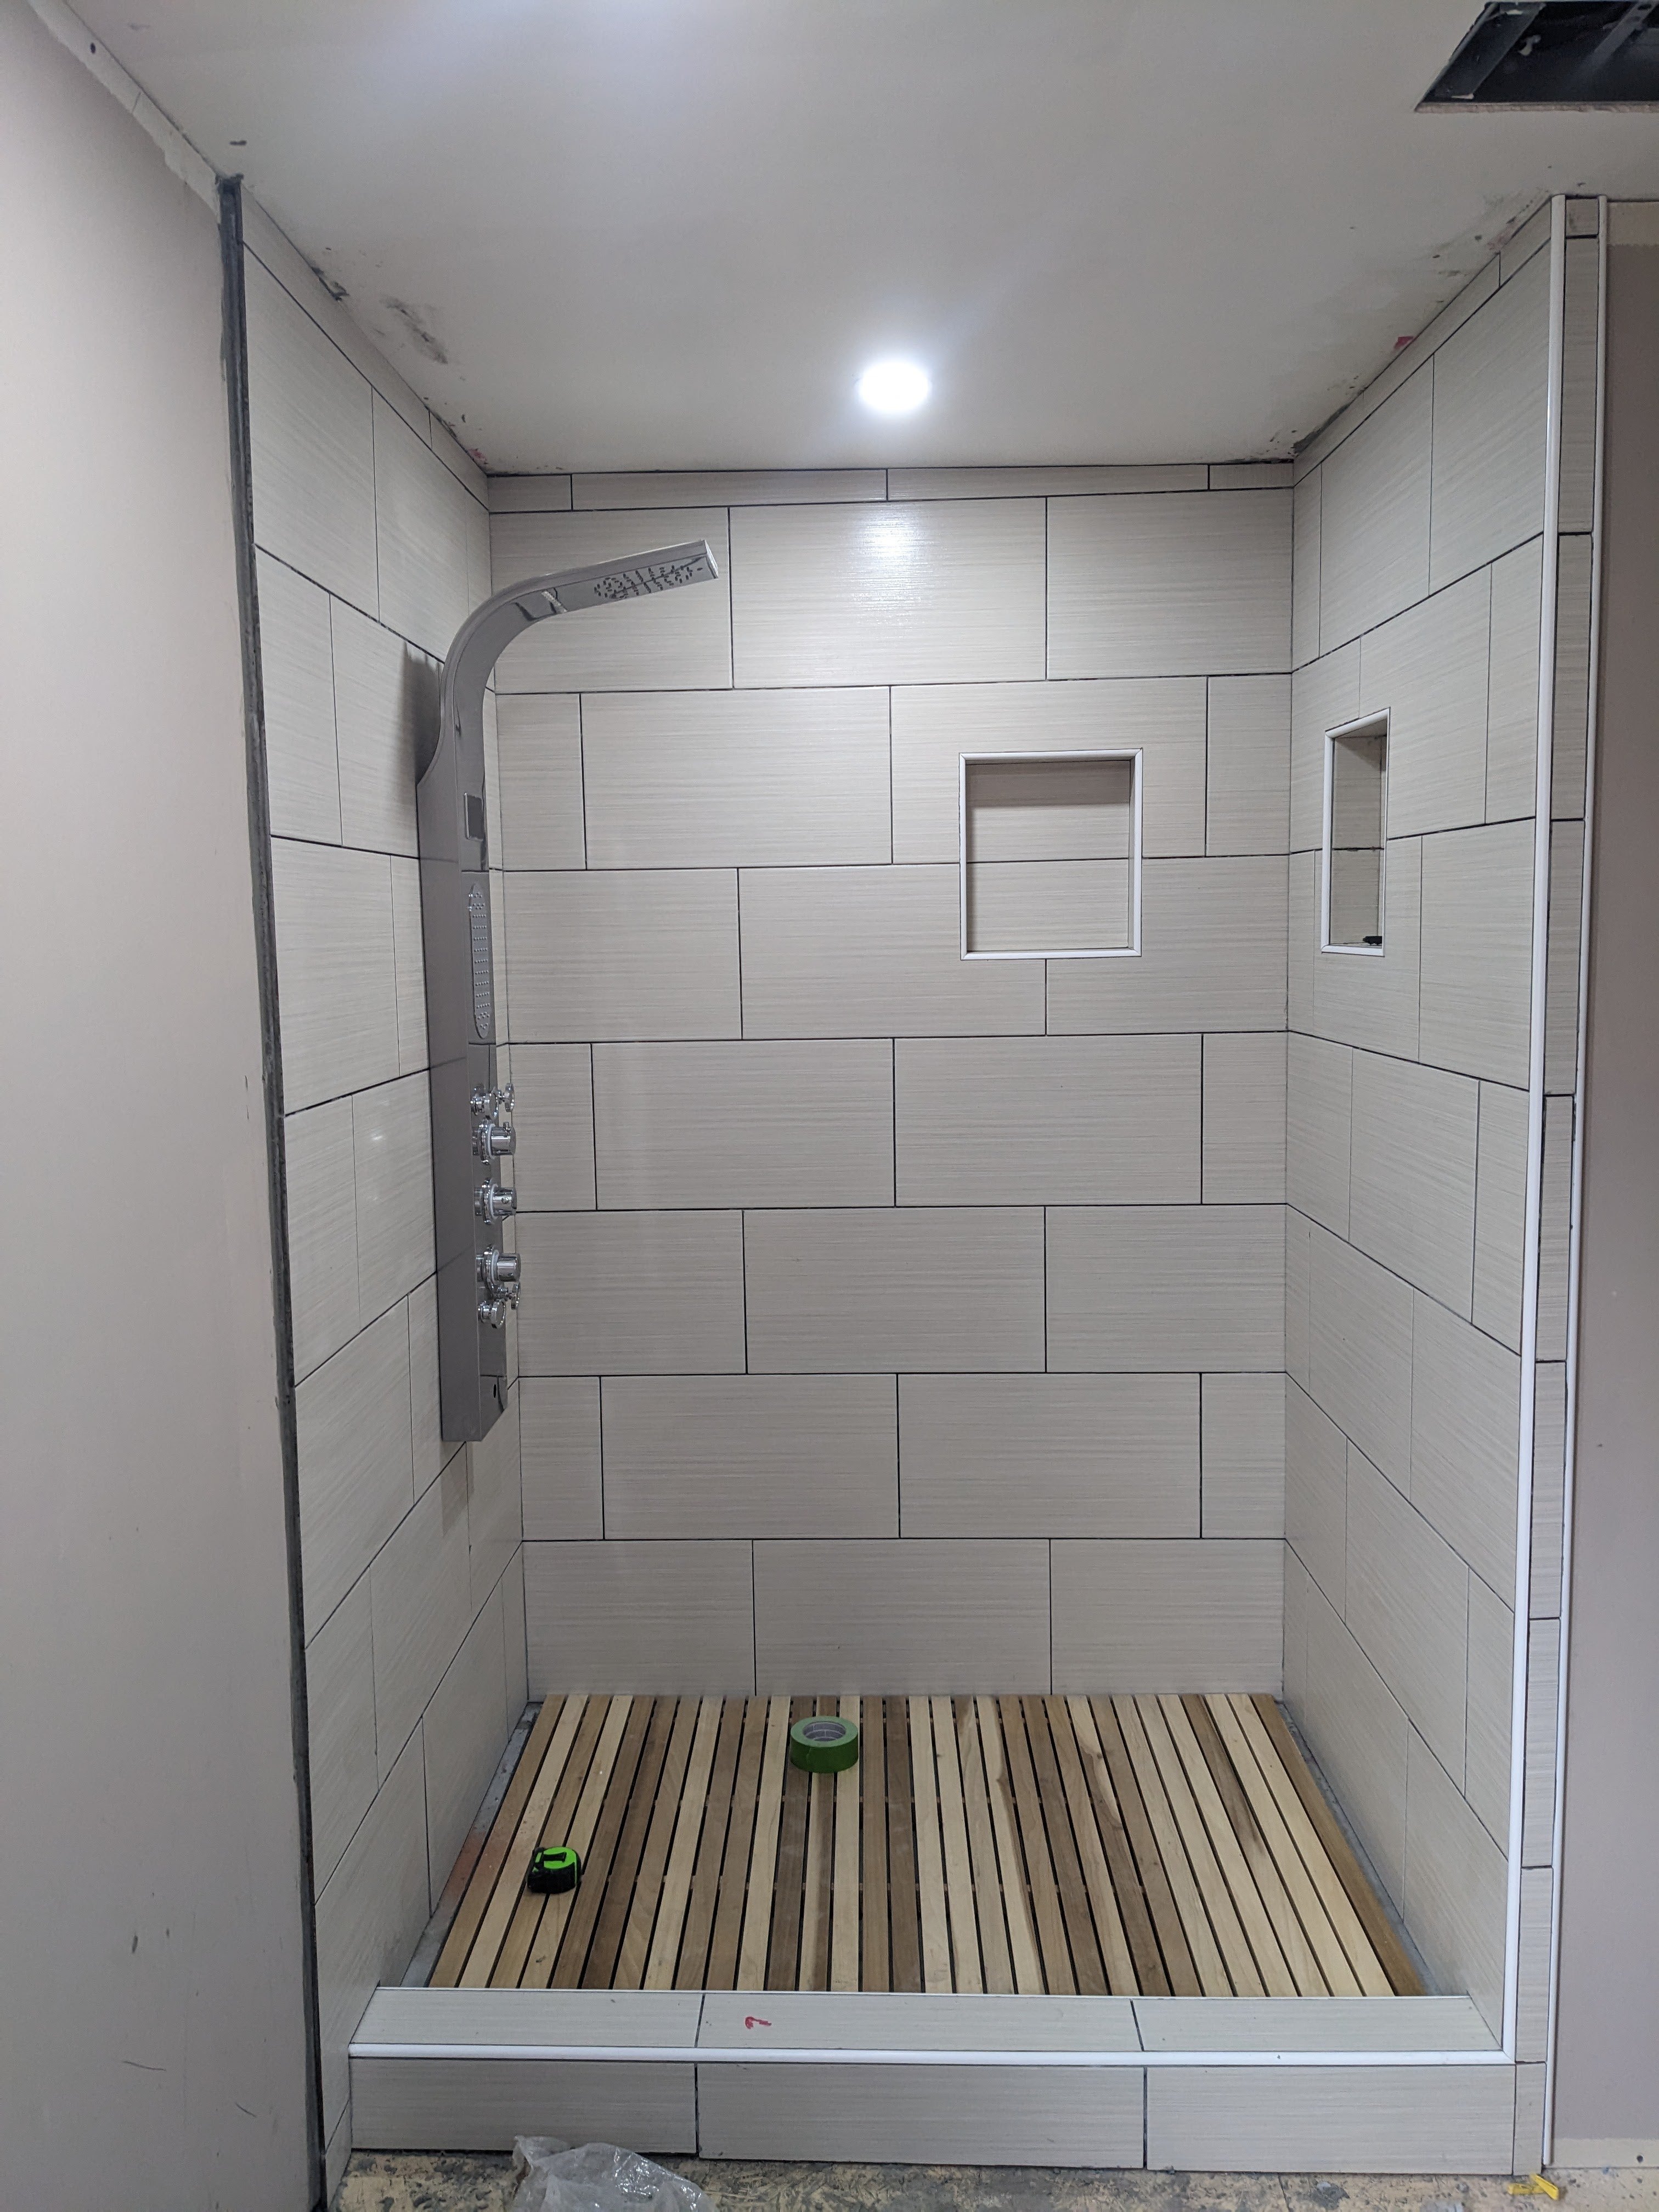
I built this from scratch, including the the wall framing, drywall, cusom mortar shower pan, and the hardwood floor insert. It was 98% complete here.
Make it, Fix it, Renovate it, Rehabilitate it - as long as you’ve done some part of it yourself, share!
Especially for gardening related or specific do-it-yourself projects, see also the Nature and Gardening community. For more creative-minded projects, see also the Creative community.
This community's icon was made by Aaron Schneider, under the CC-BY-NC-SA 4.0 license.
I built this from scratch, including the the wall framing, drywall, cusom mortar shower pan, and the hardwood floor insert. It was 98% complete here.
I love the wooden slats at the bottom. Do you find they get slippy at all?
Looks amazing! I love the wooden floor.
Would you recommend this project to a relative novice? I have this dream of adding a shower to our half bath.
Thats a hard question to answer. The overall process took a ton of planning and pulled from alot of areas that i have done some work before. If you are familiar with framing, some cement and tile work, i say go for it. Prepare for mistakes amd take your time. The shower pan was more difficult than i thought. It was my first one and i would say it was the hardest part. Getting the angles right to flow water into the drain was tedious. Id say watch some youtube videos on that part for sure and shower waterproofing. This took me about 14 days all together.
Thanks for that!
My biggest concern was the pan as well. The angles seem less like science and more like magic. Maybe I'll outsource parts of the project ha ha!
Anytime. Another option for the shower pan would be a pre-made fiberglass one. They come in a variety of sizes, but the large ones can get expensive. Good luck and share your build!
Beautiful! I'm curious, how much carpentry and plumbing experience do you have? Looks like a pro job from here :)
Wood and water? 🤔
Yep. I started with hardwood 1x2's, cut them to length, sanded them and sealed them with 5 coats of polycrylic sanding between coats. Ive used it before and it penetrates pretty well leaving a very tough finish. Its an experiment though, might not hold up. We will see.
I've seen this type of shower using tropical woods with the appropriate treatment last for a long time.
Nice project!
Between saunas and sailboats using hardwood, i figured it was worth a shot. Thanks!!
i need to do this with my shower and you've just given me total inspiration as to how i'm going to do it! beautiful work 😍
Blood!!! 💉
There was blood sweat and tears, but that is most likely part of the waterproofing membrane.

REDRUM!